
I am always amazed when I take the back door off a project cabinet and the screws are three or four inches long. It is usually a sign that someone has been inside before and did not quite know what they were doing. This Mappy cabinet was no exception. The good news is that most of the internals looked to be in decent working order. Someone had already installed a switching power supply, but its an old Peter Chou one. We’re going to replace that with a Geek Pub Arcade power supply and give the entire cabinet a proper restoration.
This restore is one of those projects where almost everything cosmetic was either broken, swollen, or just worn out. Control panel, artwork, marquee, t-molding, you name it. Underneath all of that damage though is a classic Namco Mappy, and the goal is to make it look and play like it just rolled off the arcade floor in the 1980s.
Watch the Restoration Video
Watching the video restoration process on YouTube is the best way to experience this amazing Mappy Arcade restoration!
Tearing Down the Mappy Arcade
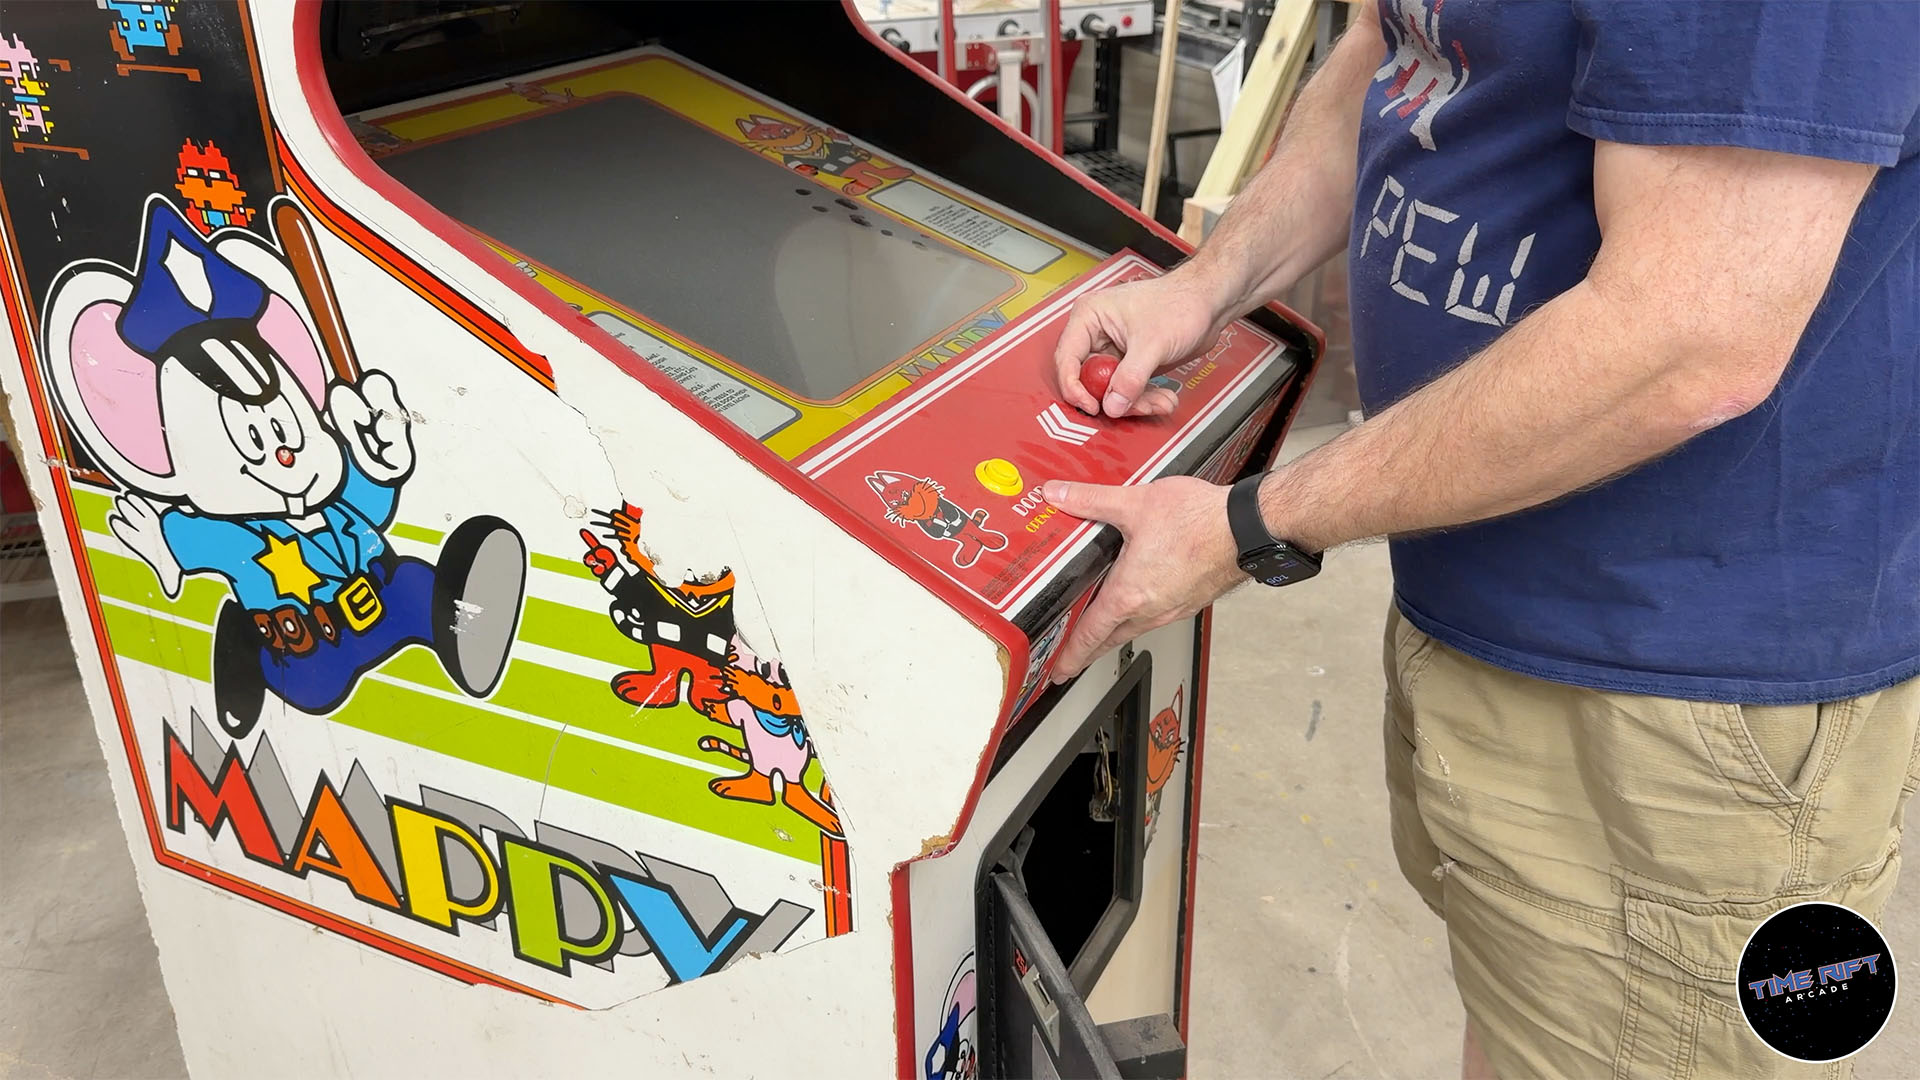
I started by removing the control panel, which was a little crusty to say the least. The control panel overlay was in terrible shape and there was no world where it was going to be reused. The bezel glass was even worse. It was scratched, faded, and basically unsalvageable, so that will need to be replaced as well.
With the control panel off, it was time to pull all of the electronics out of the cabinet. I like to remove the boardset, wiring, power supply, and especially the monitor before doing any woodworking. It keeps them safe from dust, debris, and accidents. The monitor will get a full service while on the bench.
Surprisingly, this monitor did not appear to have ever had a cap kit or a flyback replacement. That is rare on a cabinet this old. The boardset was mounted incorrectly, and the Peter Chou switching power supply was wired in a way that guaranteed a short life. Someone had plugged it directly into the service outlet. That means the boardset had power all the time, even when the game appeared to be off. So we will fix the wiring and replace the supply with a Geek Pub arcade power supply while we are at it.
Next up I pulled the marquee and topper. Unfortunately the marquee was in rough shape too, so we will source a new one. I removed the topper completely, got rid of the number badge, pulled the coin door, and stripped off all of the old t-molding. At that point we were down to a mostly bare cabinet and ready to start the serious work.
Dealing With Water Damage and Rebuilding the Side Panel
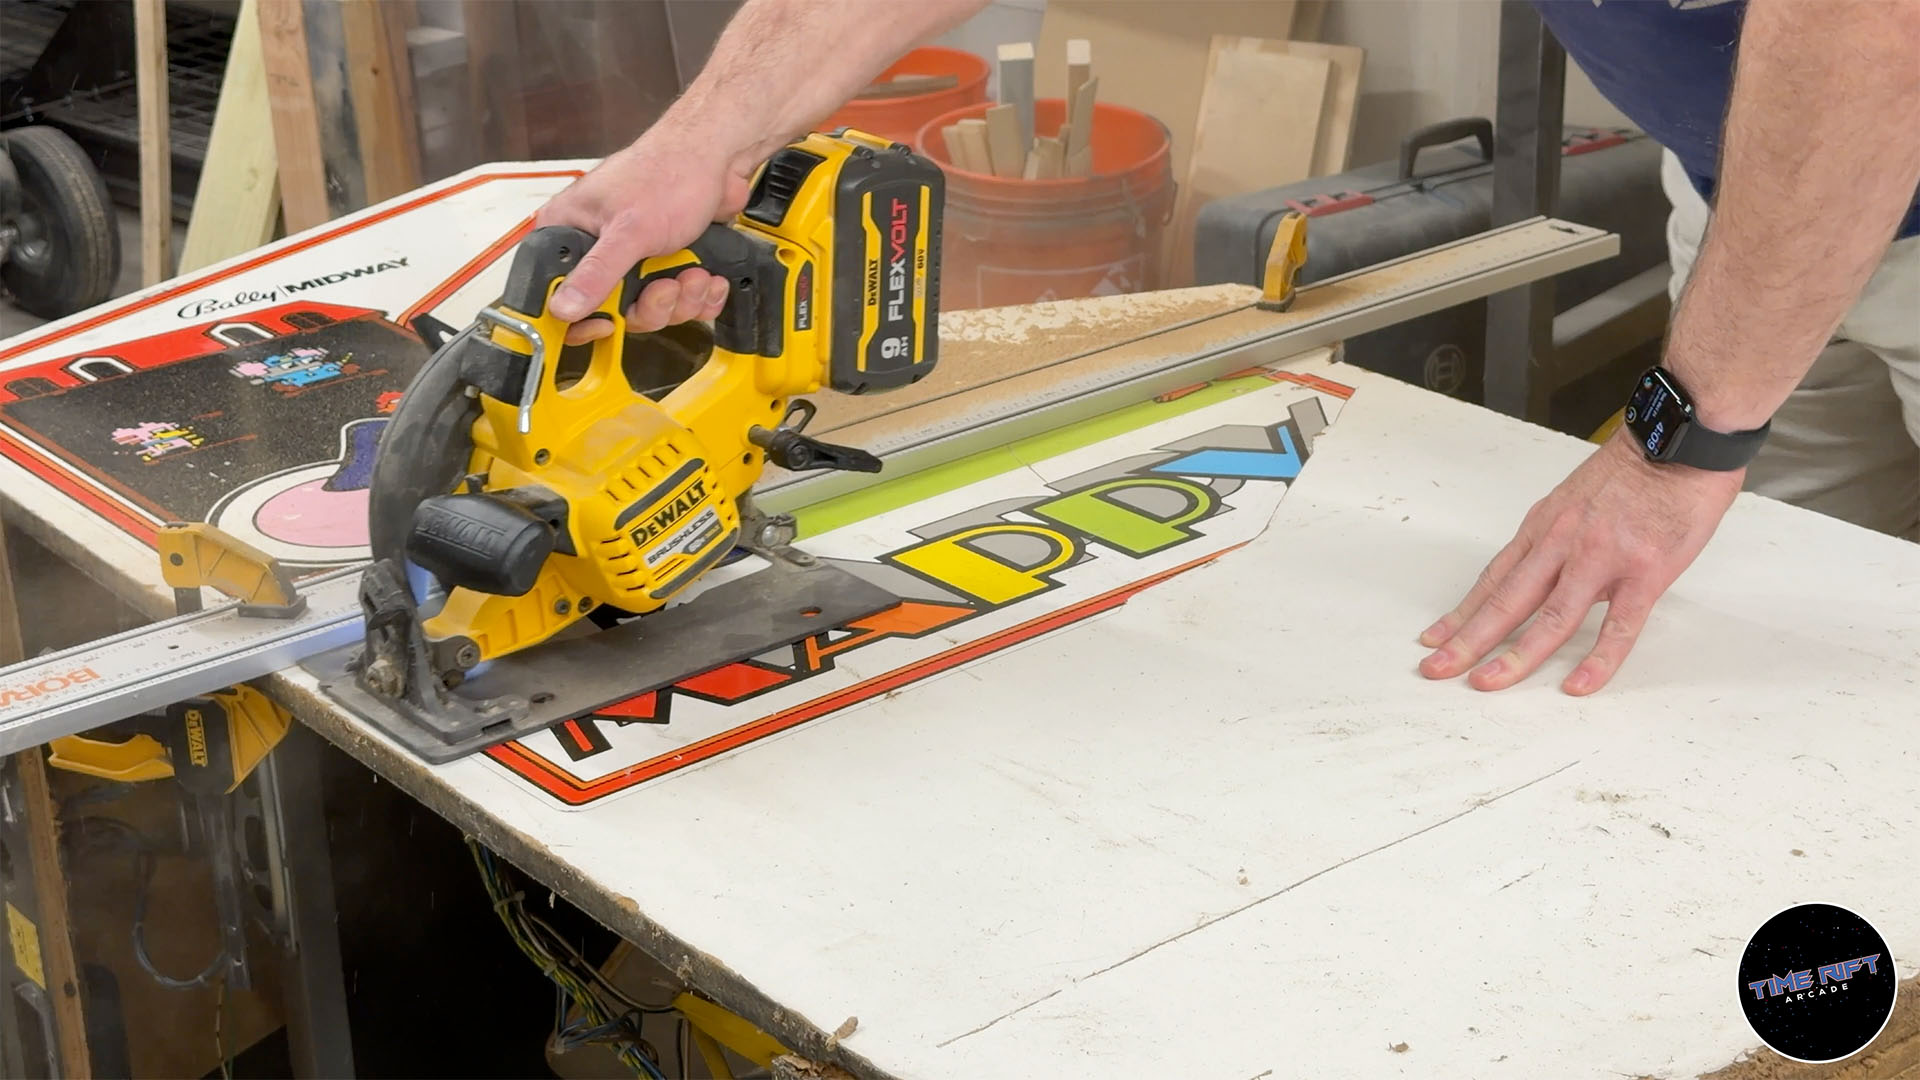
This cabinet had another serious problem. It had no feet, and at some point it had clearly sat in water. The lower portion of the left side had swelled to more than twice its original thickness. Once MDF swells like that, there really is no fixing it. The only proper solution is to replace the damaged section entirely.
I used a square to mark out the cut line on the side panel where the wood was still solid. Then I clamped a straightedge in place to guide my circular saw. This ensures the cut stays perfectly straight and the new piece will fit correctly. The damaged section was so far gone that once the cut was complete, it basically lifted off the cabinet with almost no effort.
Over on the table saw, I cut a new section of ¾ inch MDF to match the old piece. You may notice a lot of dust in the video during this step. That would be my dust collector not doing its job. We will ignore that for now and pretend it is fine.
The original cabinet used rabbets and dados to make assembly easier and stronger. To keep everything true to the original construction, I needed to recreate those joints. I cut the dados using a dado bit on the router table. For the dados that did not run all the way off the edge of the panel, I marked where the center of the bit should stop and start. For the last two cuts my router table was not large enough to reach, so I tacked on some temporary guides and used a handheld router instead. It turned out great!
To add strength where the new panel meets the old one, I used dowels. I have a doweling jig that makes lining up and drilling the holes quick and accurate. Three dowels felt like the right balance of strength and simplicity. With the dowels glued in, I spread glue along the joint, pulled everything together, and clamped it up while it dried.
Stripping Artwork, Bondo, and Surface Prep

With the structural work done on the Mappy Arcade, it was time to tackle the old artwork. I use a heat gun to soften the adhesive, which makes peeling the side art off a lot easier, although it is still a slow and tedious process. Once the art was removed, I started sanding everything down. The goal is to smooth out the transition where the new panel meets the old one and remove any leftover adhesive or high spots.
A lot of people ask why I use Bondo instead of traditional wood filler on arcade cabinets. Bondo dries much faster and cures much harder. It does not soak up paint the way wood filler does, which makes it ideal for transitions between different materials and for getting a super smooth finish under paint and artwork. I usually do at least two passes. Apply Bondo, sand it smooth, inspect, and then add one more thin layer if needed and sand again.
Once everything was smooth, the repair area looked like a single, seamless sheet. After primer and paint, most people would never know the lower half of the side panel had been replaced. Since this is a new piece of wood, it also needed a fresh t-molding slot routed into the edge for the front of the cabinet.
I filled all the nail holes and imperfections on the front of the cabinet and gave the entire thing a good sanding to prepare for primer.
Priming and Painting the Cabinet

I always prime cabinets with KILZ primer, especially if there has been any water damage. KILZ does a great job of sealing stains and helping the paint adhere evenly. I usually apply two to three light coats, about fifteen minutes apart, and then let it dry overnight.
The next day I laid down three coats of an oil based paint. I say this in almost every video, but it is important. If you plan to install vinyl artwork, you should use oil based paint. Latex paint off-gasses for a long time and can cause the artwork to bubble and peel over time. Oil based paint cures much harder and provides a better surface for adhesive vinyl.
Once the paint dried, the cabinet looked fantastic. Unless you knew to look for it, you would never guess we replaced the entire bottom section of that side panel.
Red T-Molding, Artwork, and Alignment
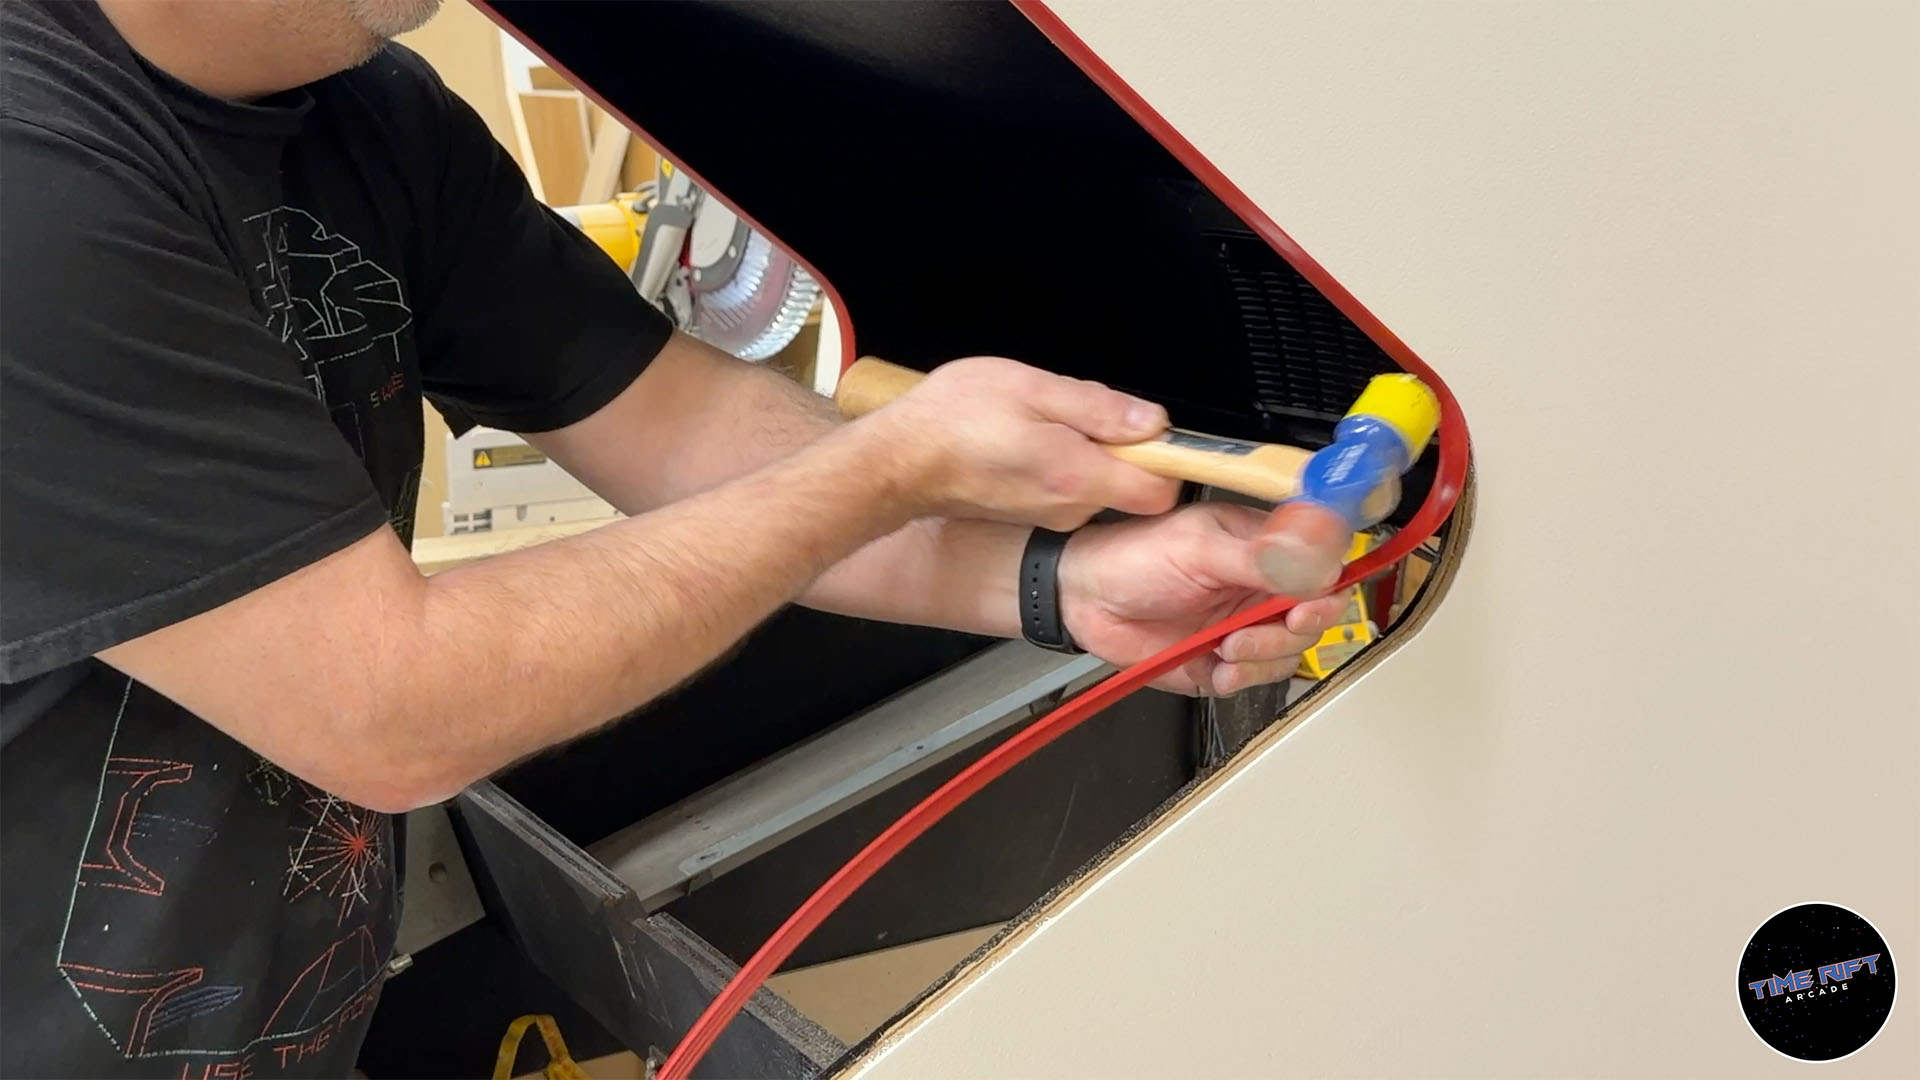
Now for a slightly controversial choice. The original Mappy cabinets shipped with orange arcade t-molding. I just cannot stand the way it looks. I decided to install a red arcade t-molding instead. It ties in better with the colors in the marquee and control panel overlay. You can let me know in the comments whether you think that was the right call or not.
Mappy’s side art is a little bit of a pain to install. The shape is odd and does not perfectly match the angles of the cabinet. After experimenting a bit, the best method I found was to tape the artwork in place loosely and then measure from specific reference points on the cabinet. I kept adjusting and remeasuring until it was exactly where I wanted it.
Once I had it positioned correctly, I left part of the artwork taped in place, peeled back a section of the backing paper, and sprayed the cabinet lightly with Rapid Tac. This gives you a little bit of slip to reposition the vinyl as you apply it. I only peel enough backing paper for the section I am working on at the moment. If you peel the entire backing all at once and then drop the vinyl, you are going to have a bad day.
After slowly working my way across the panel and smoothing everything out, the side art looked fantastic. Mappy really does have some of the most charming side art of the classic era.
Upgrading the Marquee Lighting to LEDs

Both marquee lights in this cabinet were out, so I replaced them with LED tubes. There are several benefits to LEDs. They do not generate as much heat, which means they will not brown or fade the marquee artwork. They use less energy and cost less to run. They also tend to be more reliable over the long term.
Keeping fluorescent tubes vs switching to LEDs in classic games can be a hot topic among collectors. Some people want to keep everything as original as possible. Others are fine with quality-of-life upgrades like LEDs. Feel free to argue it out in the comments.
To wire the LEDs, I used Wago style connectors to tie them into the original wiring harness. That lets me keep things serviceable and reversible if someone ever wants to go back.
With the lights installed, it was time to start the reassembly. This is always my favorite part of a restoration when all that hidden work finally starts to pay off visually.
Restoring the Coin Door and Kick Panel
The coin door on this Mappy arcade was not in terrible shape structurally, but it definitely needed some freshening up. I used to completely disassemble coin doors down to every last part, but lately I tend to remove only the major components and tape off the rest. It saves time and still gives great results.
I almost always use a black semi-gloss paint on coin doors. A full gloss looks wrong on an arcade cabinet and tends to show every little flaw. Flat paint scuffs too easily and looks tired very quickly. Semi-gloss is a nice middle ground.
With the coin door repainted and reinstalled, I installed the small artwork pieces around the coin slots. These details are what really make the kick panel pop and help bring back the original character of the game. I still had a little touch-up to do where the black meets the white on the front panel, but the cabinet was already looking drastically better.
The Most Important Detail: The Control Panel
Next up was the control panel, which is usually my least favorite part of an arcade restoration. It is a lot of tedious work, but it is also one of the most important details. A crisp, clean control panel with a new overlay is what your hands touch every time you play the game. Skipping this step turns a great restoration into an average one.
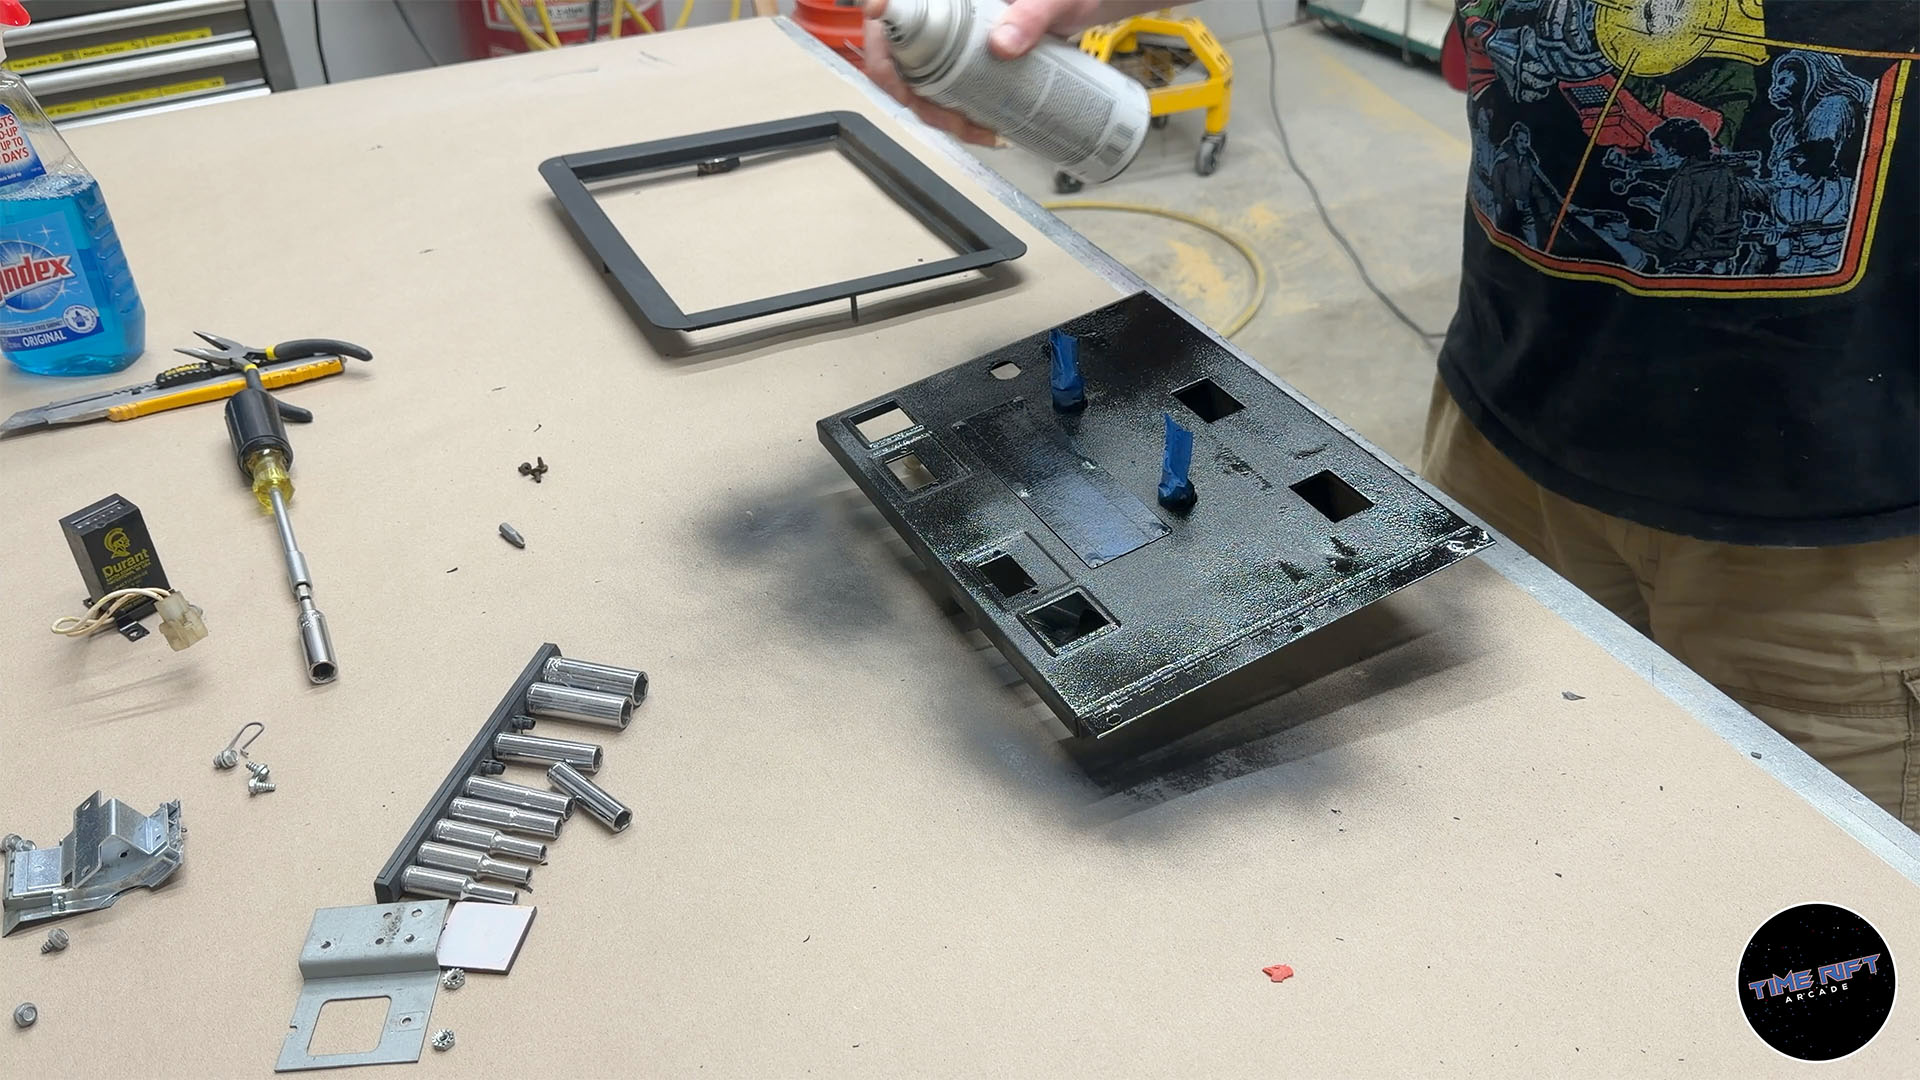
In this case, the old overlay peeled off easily because the adhesive had completely degraded. I coated the metal panel in stripper and let it sit for about ten minutes. A simple scraper would have worked, but it would have taken forever, so I put a razor blade in my multitool and quickly removed the remaining glue and paint.
After sanding the control panel back down to bare steel, I sprayed it with a self-etching primer. Self-etching primer contains a mild acid that helps it bond strongly to bare metal. Once that dried, I laid down three coats of the same black semi-gloss paint I used on the coin door.
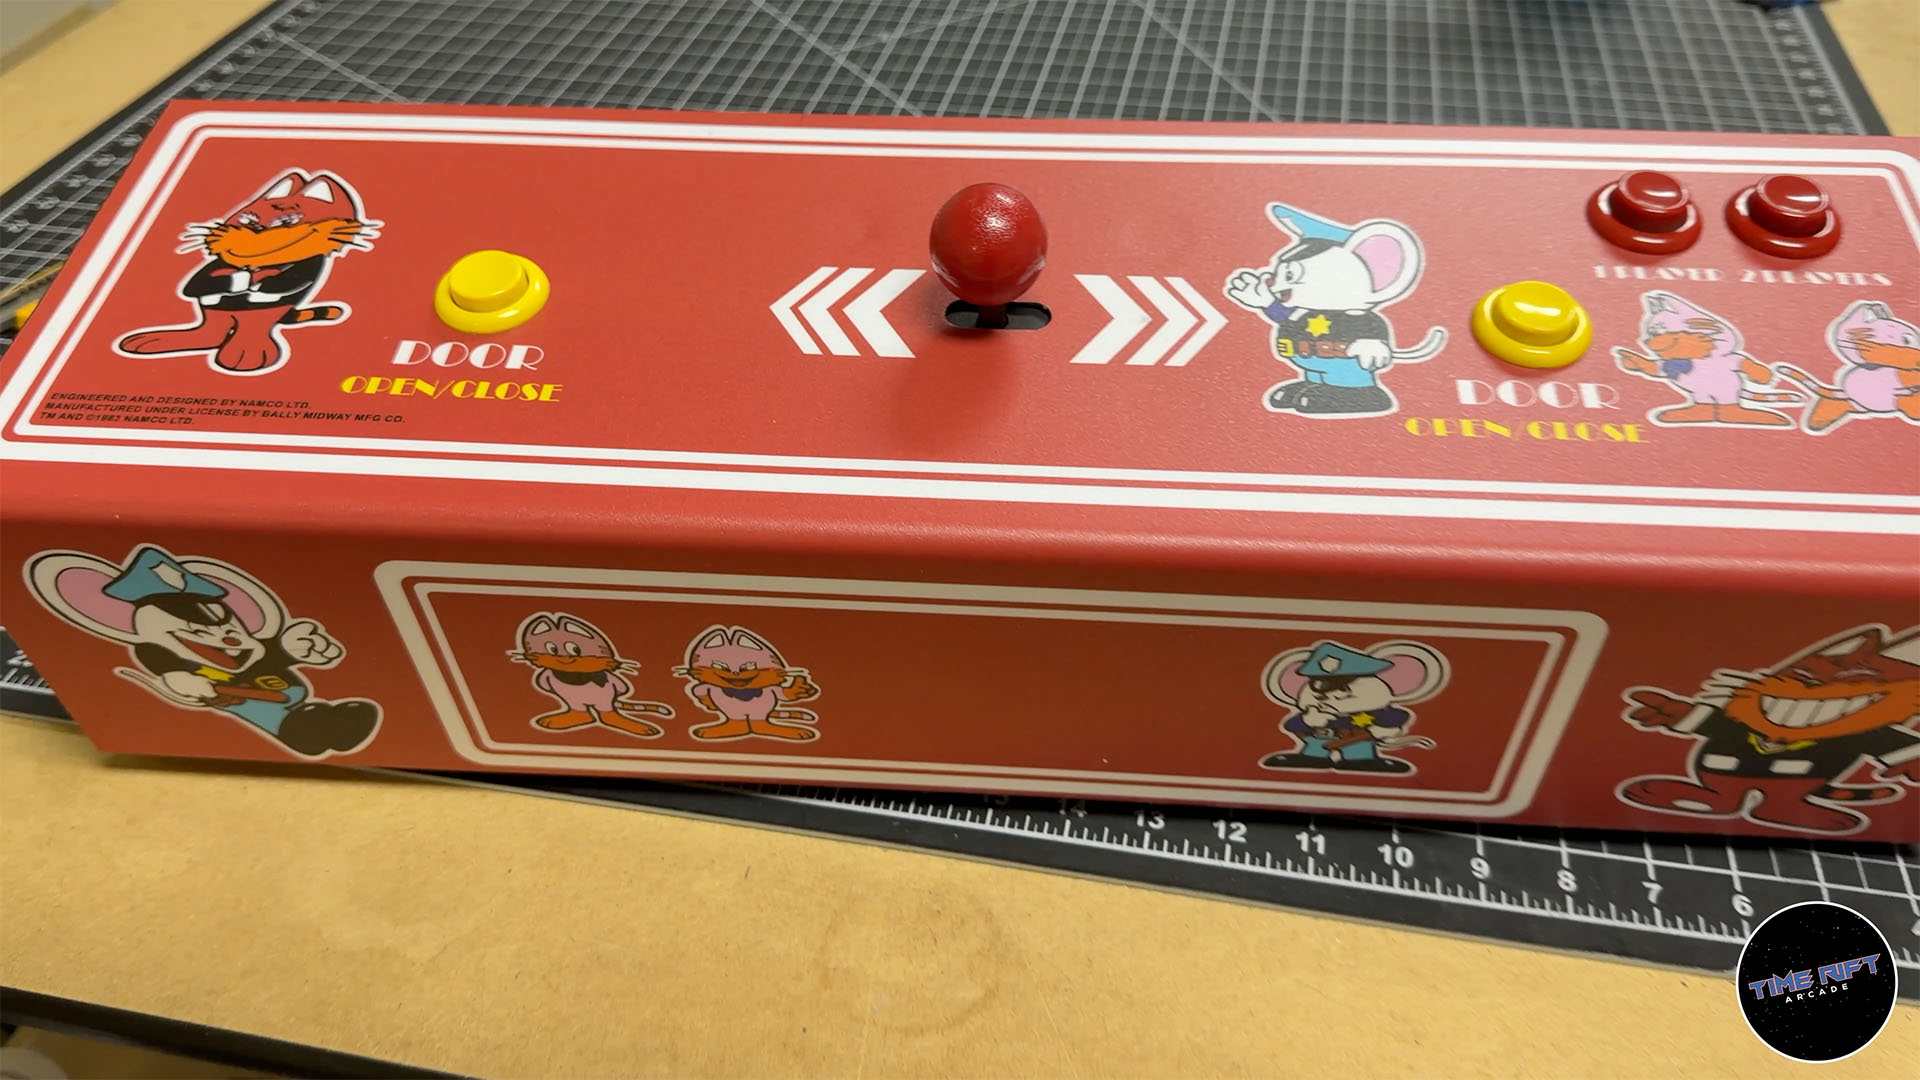
To install the new control panel overlay, I like to put a lamp under the panel so the light shines through the holes. That makes it very easy to line up the artwork exactly. Once I had it positioned properly, I taped it in place, peeled back a section of the liner, and slowly applied it, just as I did with the side art.
This overlay uses a thick polycarbonate laminate. It looks and feels great, but it is harder to bend around corners. I take extra time working it around the edges. Some people heat the overlay, but I find that does not always help and can sometimes cause more trouble. On control panels I usually install the overlay dry, without Rapid Tac, because the bends are easier to manage that way.
The last step is to cut out all of the holes for the joystick and buttons. A sharp hobby knife is your best friend here. I always recommend starting with a brand new blade. Once the controls are reinstalled, the panel looks factory fresh.
Servicing the Monitor and Final Adjustments
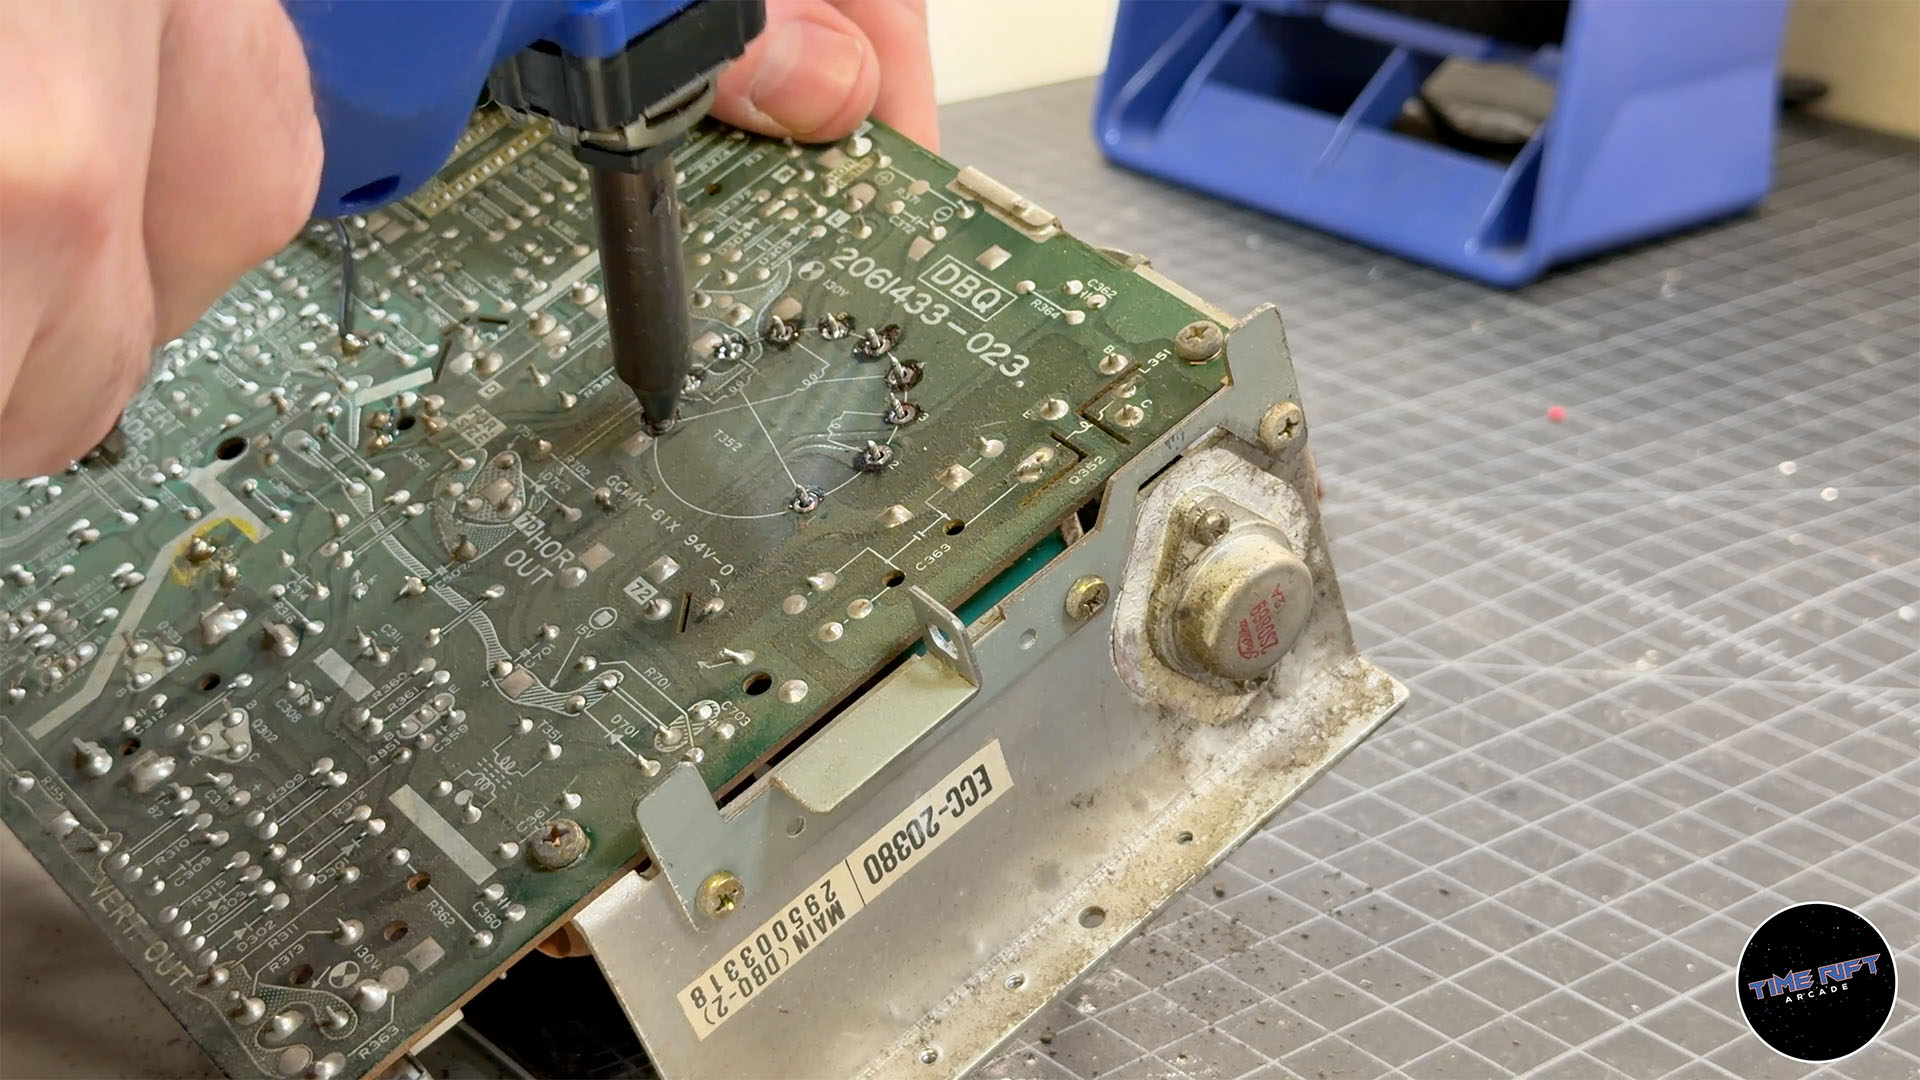
With the cabinet looking new again, it was time to give the monitor the attention it deserved. As I mentioned earlier, this monitor did not appear to have ever had a full service. I did a complete cap kit and replaced the white-knob flyback. I could do that now while the cabinet is on the bench, or I could wait six weeks until it fails on the arcade floor. Ask me how I know!!
I did not film the entire cap kit process. There are already plenty of great monitor repair videos out there. I highly recommend Mike’s Amateur Arcade Monitor Repair. He does fantastic work and is a genuinely great guy both on camera and in person.
Once the chassis was rebuilt, I hooked the monitor up on the bench with a pattern generator. I always like to test and calibrate the monitor before putting it back in the cabinet. The settings will need to be tweaked once Mappy is running, but starting from a known good baseline makes things much easier.
For the final fine-tuning, I called in reinforcements. Mike Woods has a sort of mystical ability to make monitors look perfect. While I finished up the last bits of assembly, he stopped by to help dial in the geometry, colors, and focus.
Bringing our Mappy Arcade Back to Life

After all of that work, we ended up with a Mappy cabinet that looks and plays like it just came off the line. The swollen side panel is gone, the artwork is crisp and vibrant, the control panel feels brand new, the monitor is solid, and the inside of the cabinet is wired and powered the way it should be.
It is always satisfying to take a cabinet that has been neglected, water damaged, and hacked on, and give it a second life. If you want to see this entire process in motion, be sure to check out the full restoration video and let me know what you think about the choices along the way, especially that red t-molding.